The Bude Canal Walk
This walk may be a digital online experience or an on-the-ground walk.
However, it is advised that you read the Canal history from the drop-down menu first, as it is a fascinating story in itself, but also it is really a major part of the story of Bude.
The walk is divided into three sections for ease of reference; part one is the breakwater walk; part two, is the Lock Gates and inner harbour walk and finally, part three is the walk down the canal to Helebridge. The latter would be conveniently done on a summer Sunday afternoon; this is when the Barge Workshop is open, and a volunteer will be on hand to welcome you and show you around all the canal associated items that are held there- all for free.
The Breakwater Walk, Part One
This is really a pleasant stroll from the lock gates to a vantage point above the breakwater and return.
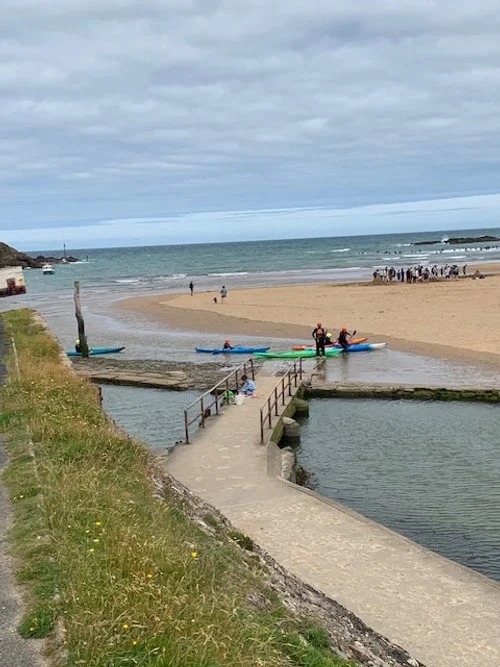
If you stand to the right of the lock gates you can now see the iron bridge below you with the river curving back into the town.
The river then heads its way out to sea with the warping post set to the left of its course. The warping posts you see in this picture were anchor points for ropes that were attached to the incoming vessel enabling the boats to winch themselves towards the lock gates. Small rowing boats, called Hobble boats, scuttled between the vessel and the posts, the Hobblers attaching the ropes as the vessel progressed in. It is also possible that the small boats may have carried the ships anchor forward to help the progress of the vessels before it could be attached to a warping post.

As you look at the breakwater from the lock gates you see the main body of the structure coming away from the cliff, leading to the large rock near its end; this rock is called Chapel Rock as, in very early history, it is said that a hermit priest or Bede had a small chapel on it, and he may have lit a fire when it was safe to enter the harbour and also to indicate the safe passage for the boats away from the rocks. This Bede gave the harbour its early name of Bede’s Haven. Beyond the large rock is a smaller outcrop with a barrel on a post. This is Barrel Rock, and the barrel represents the metal basket used as a fire beacon by the Bede.
The breakwater is a defining feature of the harbour at Summerleaze, and its significance in the Bude story should not be understated. The breakwater we see today is not the original that was built during the period 1819-1823. More of that in a moment.
Again, the warping posts can be seen following the course of the river.
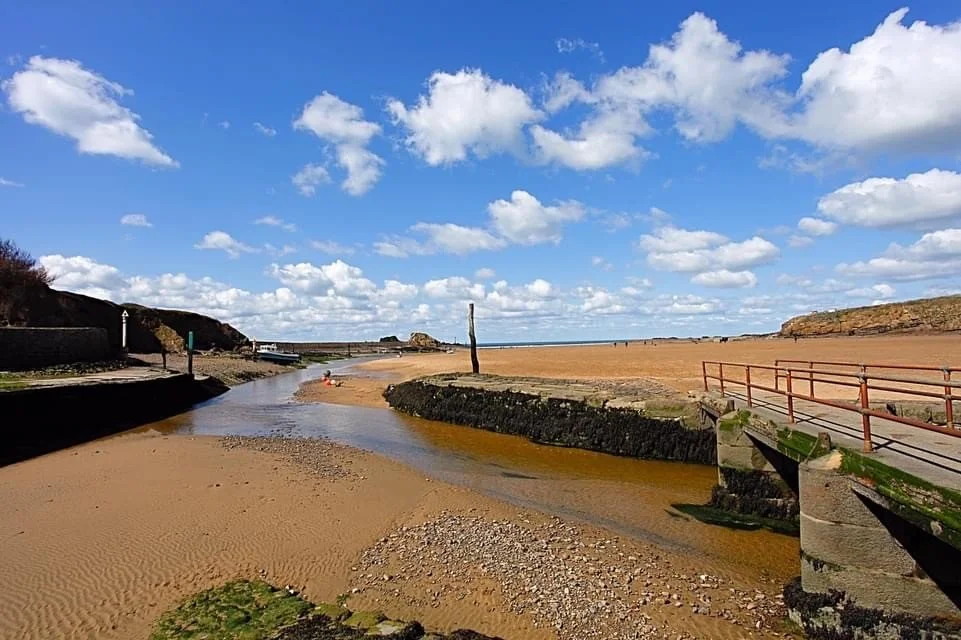
Prior to the construction of the canal and breakwater, the river Neet simply discharged more or less straight out to sea; that is along the north shore of the beach, below the cliffs and past where the open-air swimming pool is today.
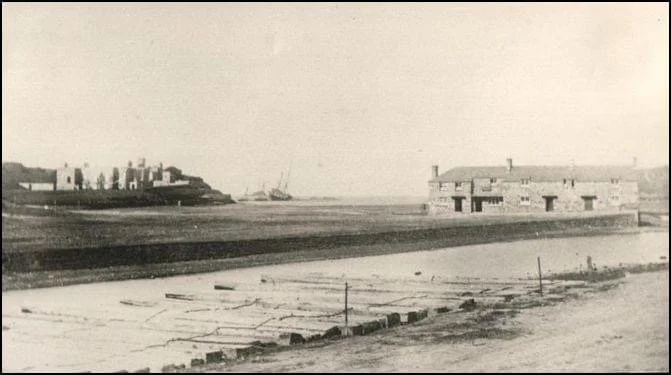
The sea was able to drive its great waves during stormy weather either side of the cottages – Leven Cottages – alongside Nanny Moore’s bridge. There were no sand hills then on Summerleaze Beach as there are today. However, sand did accumulate behind you in the area now occupied by the canal basin. The waves also sloshed their way into what may be called the high street of the town and along the Strand of today.
The scene is from an early Thorn photograph, courtesy of David Thorn and probably dates around 1886. What is amazing about this image is that this is after the building of the breakwater, but the sea was still able to drive right into town. This changed in the early nineteen hundreds when the Sports Ground was built with a protecting wall on the seaward side of the grounds.
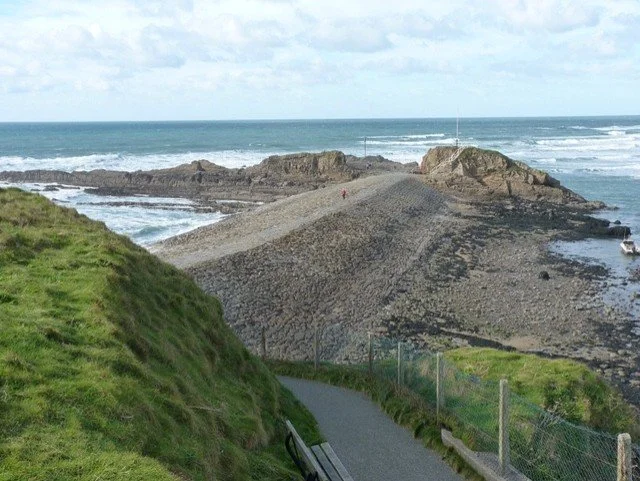
To appreciate the next part of the story, cross over the lock gates themselves and over to the right are a small set of steps taking you towards what we call “the Pink House”. To the left of this house are another set of steps leading to a path heading out to the right. This path leads to a vantage point over the breakwater with magnificent views of the harbour, the coastline and, of course, the breakwater itself.
Find a good vantage point to look down on the breakwater structure.
The canal engineers, being Victorian, thought they could build a breakwater structure that would defy the force of the sea. However, just fifteen years after its completion a storm, in February 1838, proved them wrong and the structure was destroyed and the one we see today was built during the period 1838-1841.
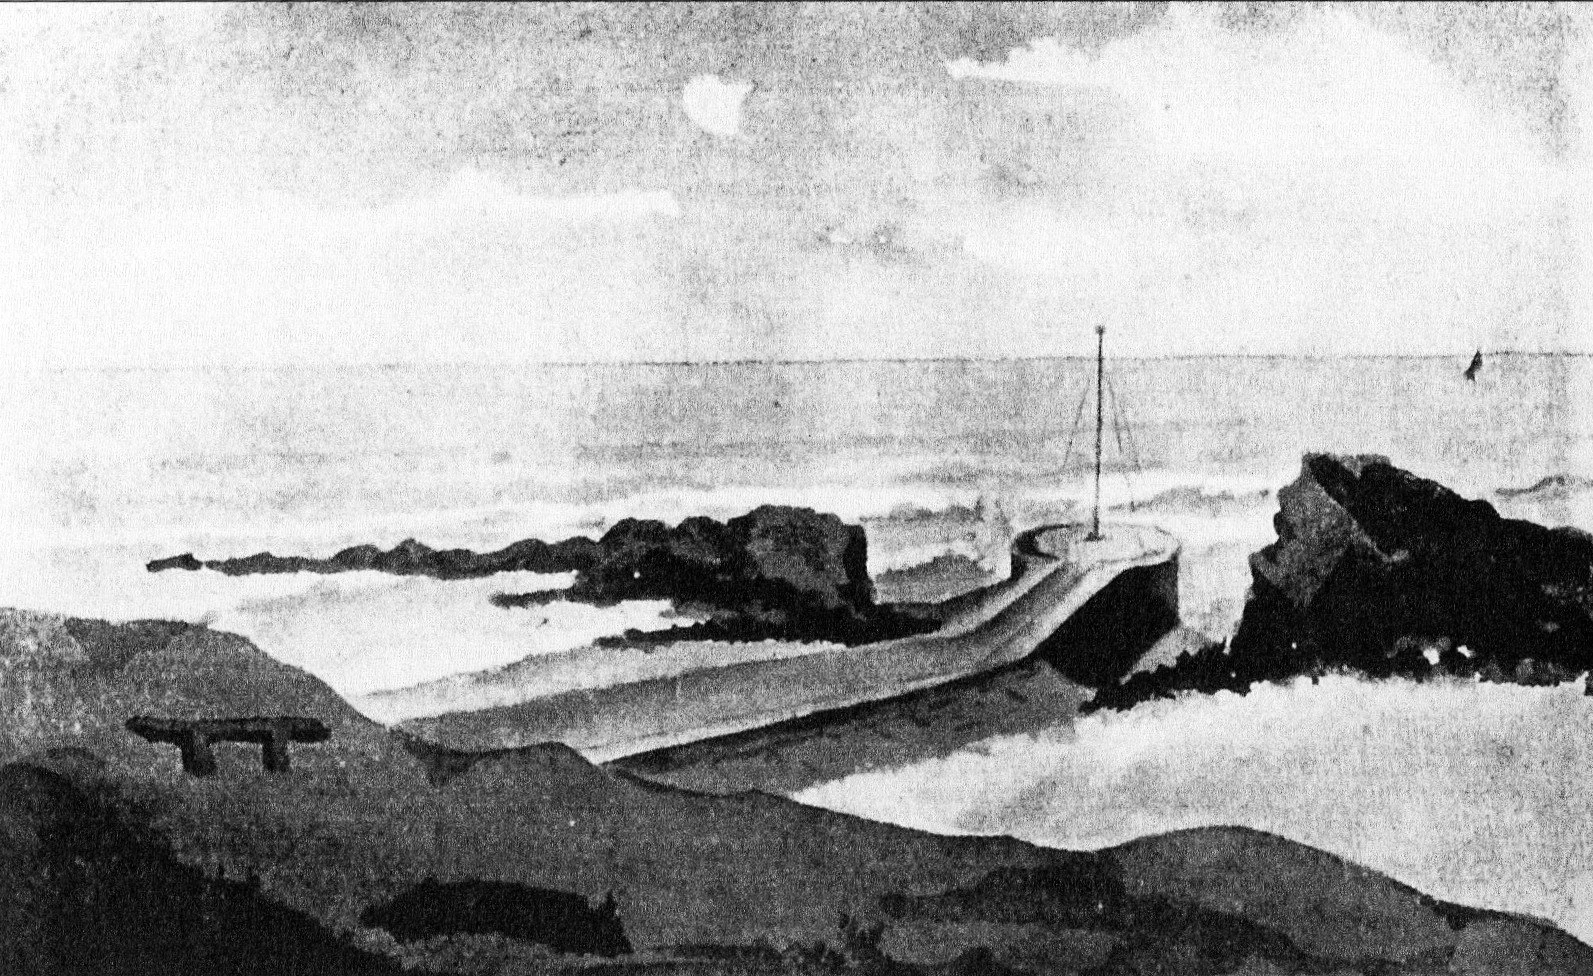
The original breakwater was around 275 metres long; about 6 metres high and tapered towards the top at around 3 meters wide. It terminated in a banjo shaped pier. However, to enable the breakwater to fully protect the harbour it was necessary to cut right through the middle of Chapel Rock. The original structure was over a metre higher than the structure you see today. The building of the breakwater must have been undertaken whenever the tides were low, whether that be day or night. On the 22nd October of the year 1820, 340 men were seen to be working on the breakwater and sea locks.
The image shows the design of the original breakwater, reproduced from a sketch by Sir Thomas Acland. The structure was finished in granite and limestone which was prepared in Plymouth in Devon, at Penryn in Cornwall and Wales. Exactly how the finished blocks were transported are not known as there were no roads as such on which such heavy loads could be carried- it is presumed this would have been a task for coastal shipping. The works were completed in 1823.
Having transported the blocks to the harbour they then had to be moved along nearer to the point of use. This appears to have been facilitated by a small rail line running along the present river course; vestiges of this can be seen at times partially covered by sand.
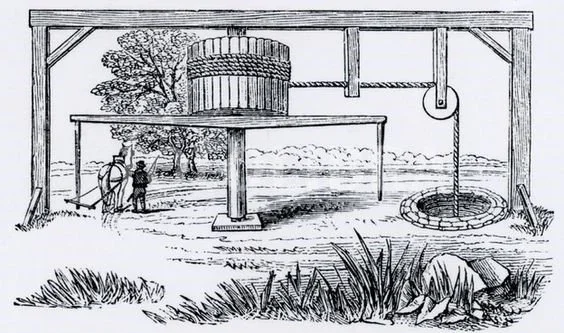
The blocks were now winched up to their point of installation by what is known as a Whim. This really was a simple winch or hoist mechanism powered by a horse and it was probably located at the terminus of the breakwater at the cliff edge.
The image actually shows the mechanism lifting from a well, but the set up is was the same to pull the blocks of granite and limestone.
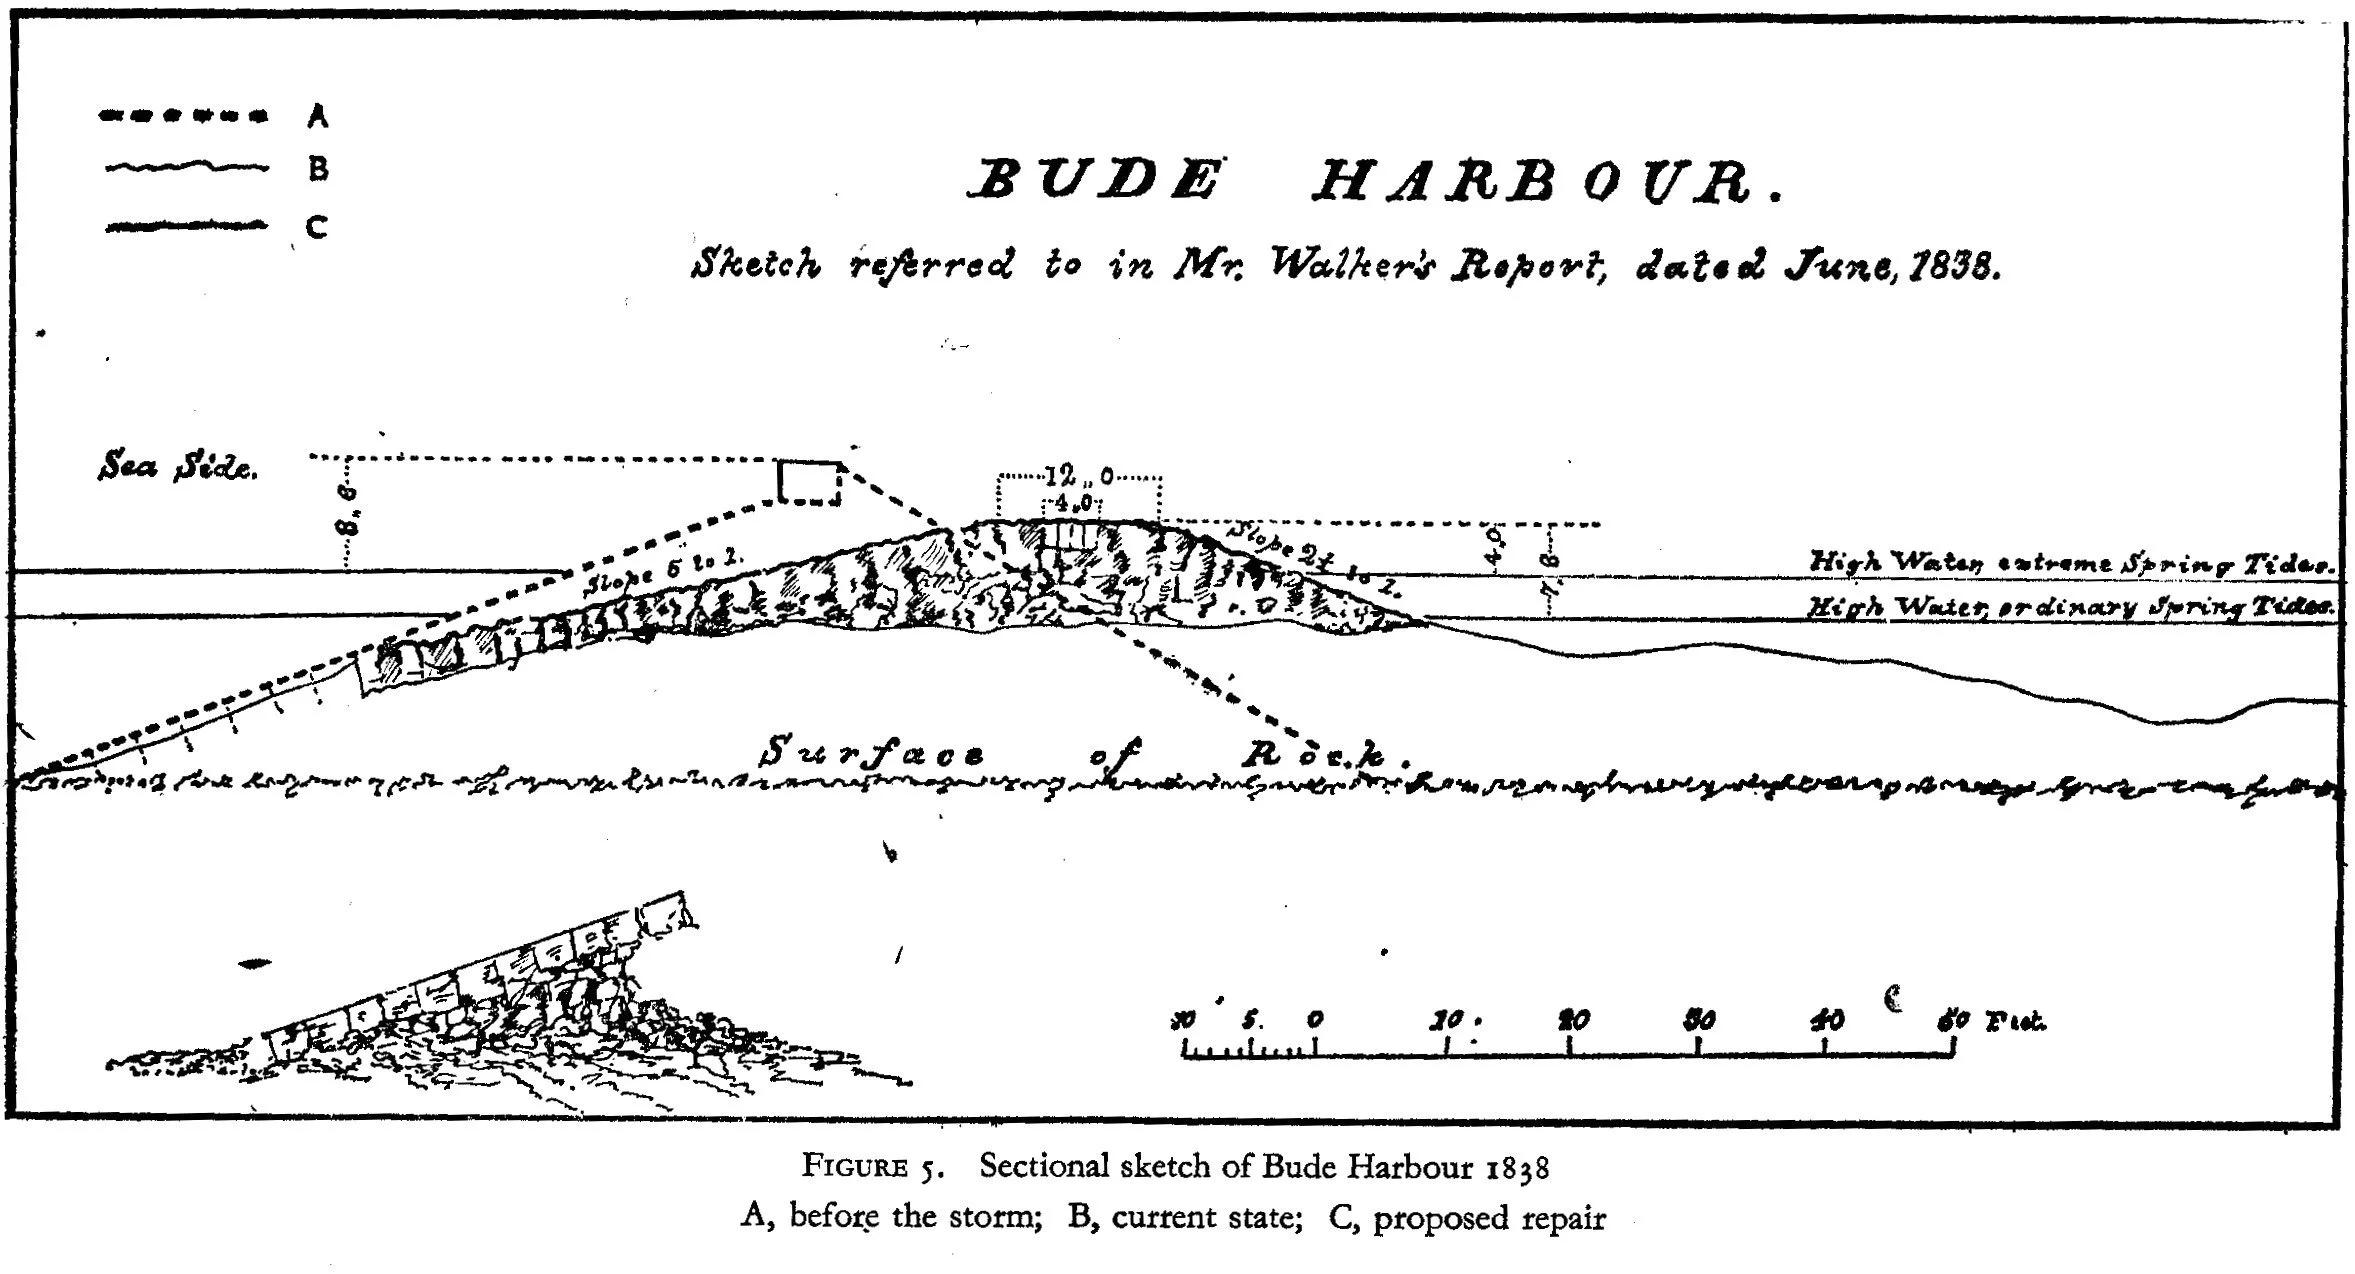
However, this rather grand “promenade” structure and form, was not capable of withstanding powerful storm waves. There were breaches from its earliest days necessitating frequent repairs often rushed as they had to take place during the low tides. Part of the problem appears to be that some of the stone used was simply taken from the local cliffs, much of which formed loose rubble within the main structure. However, during a severe storm of 24th and 25th February 1838 the whole structure gave in. Bude was not alone in suffering the consequences of this storm; many harbours around Cornwall suffered damage, so the storm was exceptional.
The harbour side slope of the structure gave way first which was attributed to large waves cascading over the top of the breakwater and falling with great force on stonework, whose mortar had been weakened by frost a month previously, the rubble core of the breakwater then being exposed. This may be a part explanation; it is more probable that there was an opening on the seaward side, and the waves will have compressed air within the structure which then exploded out through the harbour side. This effect is ably demonstrated by the blowholes one seas along our coastline- such as the one at Boscastle, to the south of Bude.
The profile of the old and new breakwater structures is shown from the original taken from a report prepared by a Mr Walker in June of 1838. It will be seen that the new breakwater has a more rounded form and is in fact around 1.2 metres lower than the old one. The idea is, of course, that the waves will flow over the top of the structure at high tide and the energy of the waves will dissipate over the curved surface.

Nevertheless, even the latest structure needs constant attention with rebuilding often taking place; also, the whole core of the structure has had quick setting cement poured into its interior and around some of the larger blocks.
Now return to the lock gates to see the river course.

The breakwater for all its problems did offer greater protection for the ships at rest in the harbour, if they could safely negotiate the dangerous seas as they pass the Barrel Rock. The painting, by local artist Roger Adams, gives an impression of how dramatic this could be, albeit probably not in full sail, as shown. Many vessels came to grief at this point. as there is a tendency for the vessel to surf on the incoming wave and then broach, sideways on to the wave. And, as has been explained, once beyond the Barrel Rock, the vessels could be warped to their destination, whether that be in the harbour or in the locks and eventually up into one of the two canal basins.
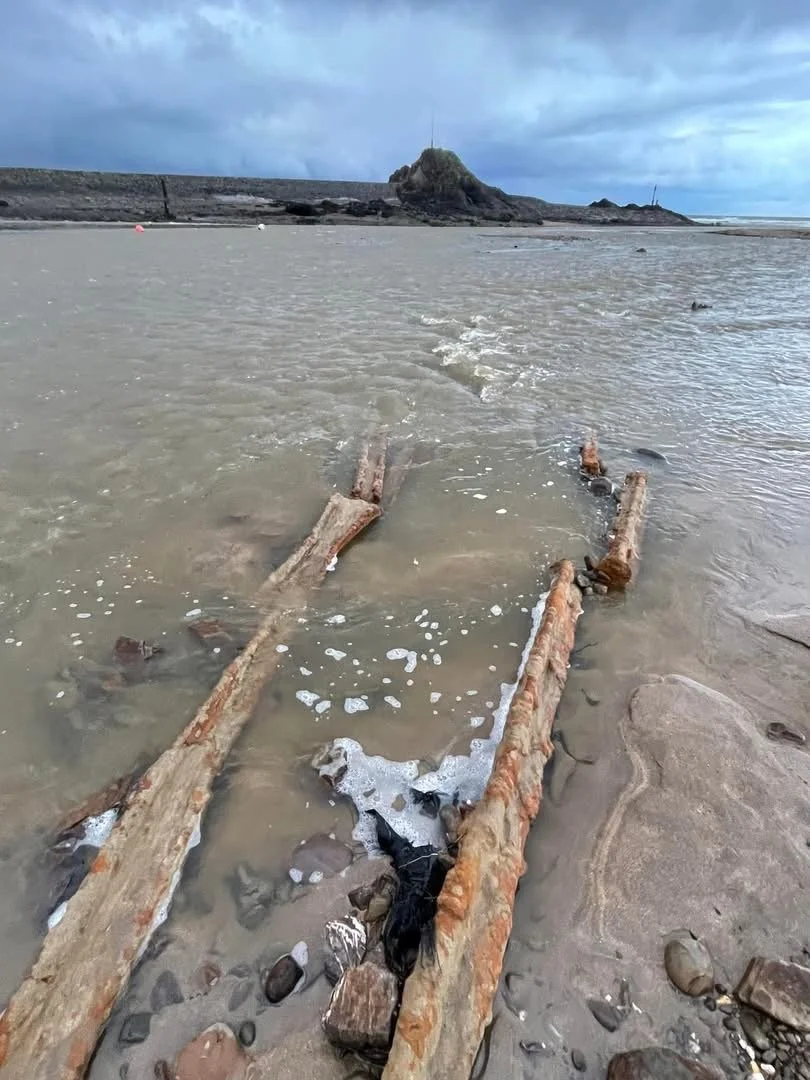
Even at the stage of warping the vessel may break free of the warping rope and drift into the waves. This happened to the Elizabeth in February 1912, whose mast you can see on Summerleaze Downs opposite.
This picture is In the author’s collection.
The Barrel can just be seen above the splashing waves.
The breakwater may be seen as a principal piece in a wider project for the harbour. The breakwater protected the inner harbour and the town itself from the main thrust of the Atlantic waves. However, the course of the river had to be encouraged to flow towards the lock gates, which today it does. The idea being that the river flow will carry sand away from accumulating in front of the lock gates and along the river course, defined today by those warping posts.
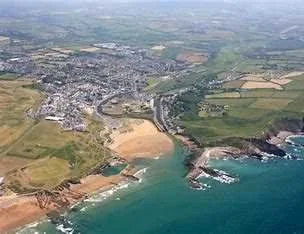
This drone shot of the harbour shows the river Neet curving through the town and then curving to the right towards the lock gates and beyond.
Also, just in view to the left of the photo is the open-air swimming pool and it can be seen how the river course before the canal era would have pushed its way straight out to sea.
Equally, it can be seen that without the breakwater the sea will have driven it full force into the town.

However, the protection offered by the breakwater, plus the river following its new course, meant that sand accumulated on Summerleaze Beach and here was a network of narrow rail lines radiating out in all directions from a small turntable sometimes to be seen just on the beach beyond what is called the iron bridge, that’s the one just below you on the right. By a quirk of the tides, it is always possible to cross this bridge onto the beach at mid-day.

The vestiges of sand rails can still be seen heading up the slope towards the lower basin where the collected sand was discharged onto barges, which then made their way up the canal towards Helebridge. In 2025, the north side of the canal was reinforced and some of the sand rails replaced, and all are now mostly below the surface to permit safer entry to the beach for all users. The actual cross section of the rails did change. The original track of 4ft gauge used Plateway Rails, “L” and “U” section, replaced in 1923 with the 2ft gauge “I” beam track. The Plateway rails were bolted to 18-inch square granite “sleepers” some of which are exposed today in their original place in a passing section. The early forms tended to collect stone within their form which then dislodged the wheels. The modern raised shape rail is set too high for this to happen.
The picture shows the early “L-Shape” rail form from which we can see how stones could settle within the shape and dislodges the sand kart wheels.

Today the breakwater adds beauty to the harbour scene, it provides a recreational facility for all, even having a small swimming pool near the Barrel Rock, built by Sir Thomas Acland and today called “Tommys Pit”. It continues to offer protection to the small recreational fleet of fishing boats and creates a slightly safer surfing beach for surfers of all abilities and for those wishing just to enjoy the thrill of splashing around in the waves. However, today, sand is no longer taken from the beach and a byproduct is that sand has accumulated on the eastern end of the beach and created the enormous sand hills we see today. In fact, this does create the additional problem of blown sand spilling on to the car park, but conversely, the sand hills offer a buffer against the worst of the storm waves, which sometimes eat their way into the hills themselves as can be seen from the photo.
Part two of this walk will follow very soon. 02/09/25.
If you enjoy reading about our history without any adverts appearing, please help me to meet all the cost with a small donation.
For extra security, the link below will take you directly to a payment centre without an intermediate stage.
For more details of how this donation will benefit you and young local people to our area, please select “info” on the menu button.
Your payment will be much appreciated, however small, thank you.